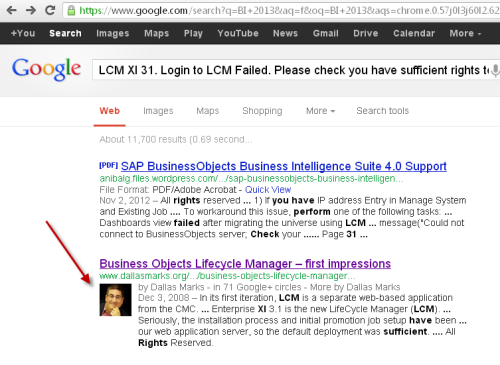
One of the things I love about the BusinessObjects Analytics community is the camaraderie and fun we enjoy as we help organizations improve through the use of Analytics. Whenever I need an answer, I can quickly google search and between BOB, SCN, and my tweeps I can often find what I’m looking for. During a recent search I came across this!

How cool was that? Not only was this a post from a fellow BOBJ blogger, but there was his picture next to it! Forget Mick Jagger, I want to be cool like Dallas!
Of course it’s also true that case studies have shown signs that these enhanced results dramatically improving click-through-rates of up to +150%, which in return can result in an influx of both visitors and page views. You don’t have to be an analytics genius to understand the value of 150% more traffic!
There are four easy steps for setting up your blog so that your picture appears next to the Google results.
Step 1 – Create a Google+ Profile
I really didn’t want to do this. I already have a Gravatar. Isn’t that enough? Nope. (I tested it.) You must use Google+.
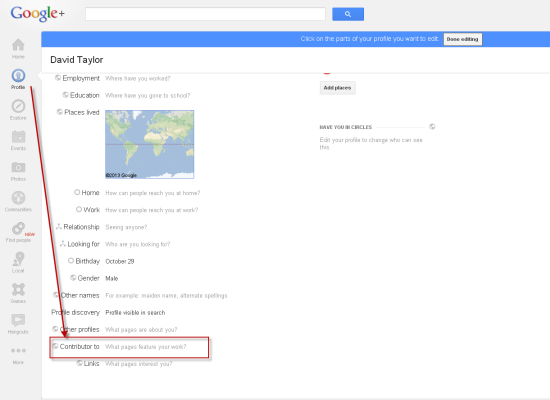
- Add a photo to your Google+ Profile
- Modify your profile and add Contributor To and reference your own blog.

Step 2 – Add Authorship Markup Code
Insert the following link into the head section of your websites code:
<a rel="author" href="https://plus.google.com/116022480808836686834"/>
Replace the red number with your Google+ profile ID. Google uses this number in combination with the Contributor To information listed in Step 1 to determine a positive match.
Some WordPress bloggers have also used the Yoast SEO plugin to quickly go in and modify their “Titles and Metas”. It has a section where you can specify the Author metadata.
If you are interested in more details about setting this up I found this post particularly helpful:
http://webfor.com/how-to-implement-rel-author
http://www.daniellawseo.com/rel-author-wordpress/
http://support.google.com/webmasters/bin/answer.py?hl=en&answer=1408986
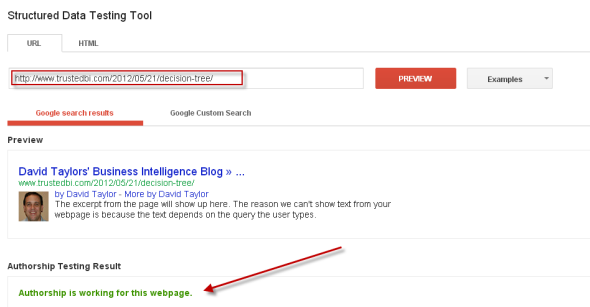
Step 3 – Test A Few Blog Pages

Step 4 – Check Your Blog Using Google Search
Patience is a virtue that carries a lot of wait.
From time to time go in and perform a Google search that will return results from your blog. Your picture should show up within a few weeks.
«Good BI»

Neat trick. I confirmed that you are correct – Google is not using my Gravitar photo. I use a unique photo for Google+ which is what appears in Google search results. But I didn’t do the steps you outlined. Perhaps my Google+ photo magically appeared because I already use Google Adsense and/or Google Analytics?
All I know is that I want to be cool like you!